Introduction to Homemade Cookie Making
Making homemade cookies is a fun experience that brings joy to everyone. You can make perfect chocolate chip cookies in your kitchen with the right tools and knowledge. Let’s look at why homemade cookies are better and what you need to start.
Why Homemade Cookies Are Better
Homemade cookies are fresher and taste better. You choose the ingredients, so you know they’re high quality. You can also make them your way, which means they taste exactly how you like. Homemade cookies beat store-bought ones in taste every time.
Essential Baking Equipment
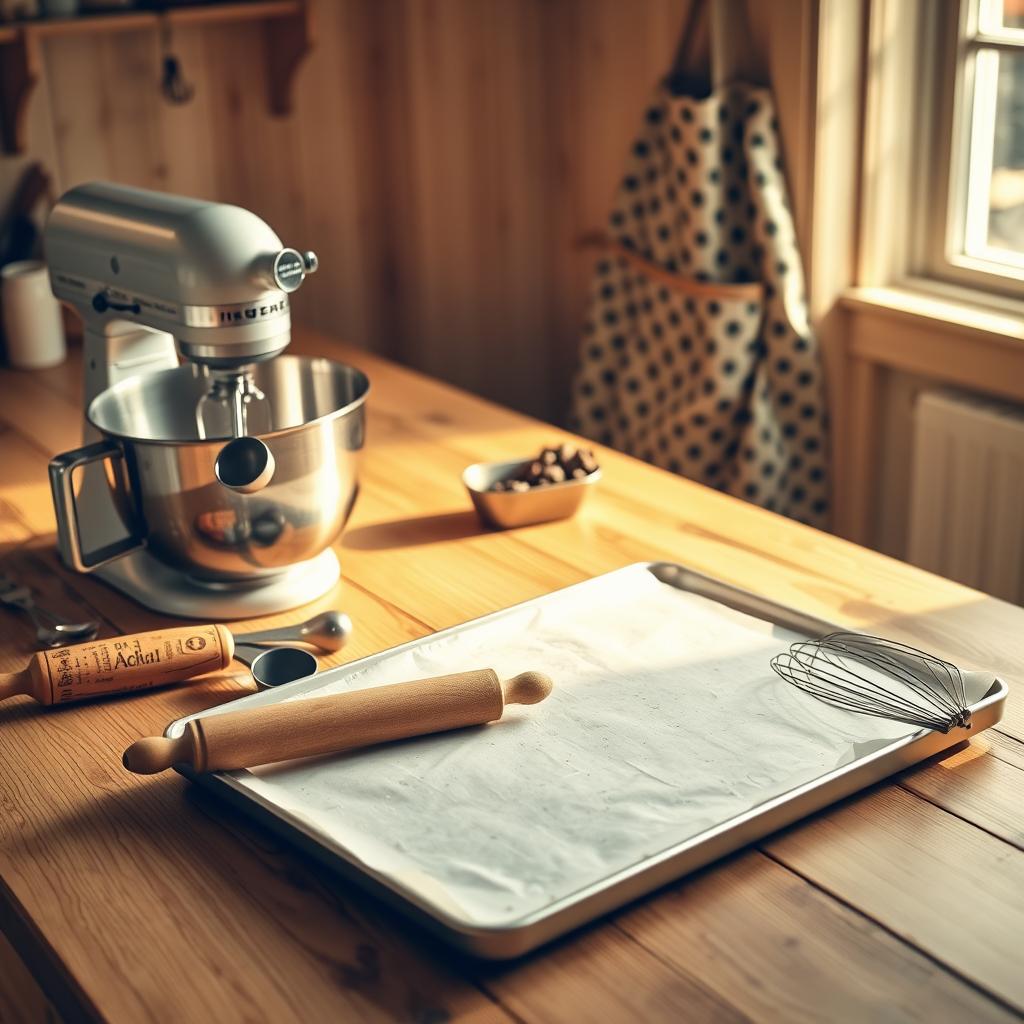
To make perfect homemade cookies, you need some basic tools:
- Baking sheets
- Mixing bowls
- Measuring cups and spoons
- Cookie scoop (2 tablespoons)
- Cooling rack

Basic Baking Safety Tips
When baking cookies, safety is key. Always use oven mitts when handling hot baking sheets. Keep your area clean and dry to avoid slipping. Wash your hands before and after touching raw ingredients. Following these tips will make your baking experience safe and fun.
Now you’re all set to start your homemade cookie journey. Remember, it takes practice to get it right, so don’t worry if your first batch isn’t perfect. Happy baking!
Understanding Cookie Science

Explore the world of cookie chemistry and baking science to discover the secrets of perfect chocolate chip cookies. The basic cookie formula includes sugar, flour, butter, eggs, and a rising agent. When you mix these ingredients, many scientific reactions happen at once during baking.
Butter temperature is key to cookie texture. Melted butter makes cookies fudgy, while creamed butter adds air for leavening. The mix of white and brown sugar also matters. White sugar makes cookies crispier, while brown sugar makes them softer because of its moisture.
All-purpose flour is best for cookies, giving them a chewy texture. The creaming method, which mixes butter and sugar until light and fluffy, is crucial for success. It’s important to add dry ingredients carefully to avoid too much gluten.
- Baking soda (¾ teaspoon) helps with spreading and browning
- Chilling dough for at least 4 hours improves flavor and texture
- Dark chocolate with over 60% cocoa solids offers optimal melt and flavor
Knowing these cookie chemistry principles helps you make better choices when baking. By understanding the science behind cookies, you can make the perfect batch every time.
Essential Ingredients for Perfect Cookies
Making delicious cookies starts with picking the right ingredients. Quality ingredients make a big difference in taste and texture. Let’s look at the key components that will make your homemade treats special.
Choosing the Right Butter
Most cookie recipes use unsalted butter. It lets you control the salt and ensures a creamy flavor. For this recipe, you’ll need 10 tablespoons (140g) of unsalted butter.
Types of Sugar and Their Effects
A mix of brown and white sugar is perfect. Use ¾ cup (150g) packed brown sugar for chewiness. Add ½ cup (100g) granulated sugar for crispness. This mix gives cookies with golden edges and soft centers.
Best Chocolate Selection
The star of chocolate chip cookies is the chocolate. Choose 1 ¾ cups (226g) of high-quality semisweet chocolate chips. They melt beautifully and add rich chocolatey goodness in every bite.
Quality of Vanilla Extract
Don’t skimp on vanilla extract. Use 2 teaspoons of pure vanilla extract to enhance the flavor. For an extra flavor boost, add ½ teaspoon of espresso powder.
| Ingredient | Amount | Purpose |
|---|---|---|
| Unsalted Butter | 10 tablespoons (140g) | Flavor and texture |
| Brown Sugar | ¾ cup (150g) | Chewiness |
| Granulated Sugar | ½ cup (100g) | Crispness |
| Semisweet Chocolate Chips | 1 ¾ cups (226g) | Chocolatey goodness |
| Vanilla Extract | 2 teaspoons | Flavor enhancement |
Chocolate Chip Cookies: The Classic Recipe
Ready to bake the perfect chocolate chip cookies? This classic recipe is a must-try for any cookie lover. It has the perfect mix of sweet and salty. These cookies will quickly become a family favorite.
Let’s look at the ingredients you’ll need for this traditional cookie recipe:
| Ingredient | Amount |
|---|---|
| All-purpose flour | 2 2/3 cups (320g) |
| Unsalted butter | 1 1/4 cups (2 1/2 sticks) |
| Light brown sugar | 3/4 cup (150g) |
| Granulated sugar | 1/2 cup (100g) |
| Large eggs | 2 |
| Pure vanilla extract | 1 teaspoon |
| Baking soda | 1 teaspoon |
| Kosher salt | 1 teaspoon |
| Semisweet chocolate chips | 1 cup (170g) |
| Chopped chocolate wafers | 1 cup (120g) |
To make these delicious cookies, preheat your oven to 350°F. Mix the dry ingredients in one bowl and cream the butter and sugars in another. Combine the wet and dry ingredients, then fold in the chocolate chips and wafers. Scoop about 3 tablespoons of dough per cookie onto baking sheets, spacing them 2-3 inches apart.
Bake for 12-14 minutes until golden brown. Let them cool on the pan for 5-10 minutes before transferring to a wire rack. This recipe yields 24 mouthwatering cookies. They’ll stay fresh for up to 5 days when stored in an airtight container.
For an extra rich flavor, chill the dough for at least 4 hours or up to 24 hours before baking.
Mastering the Butter Temperature
The type of butter you use in cookies can make or break your recipe. Knowing how butter temperature affects your baked goods is crucial. It helps achieve the perfect texture and flavor.
Benefits of Melted vs Softened Butter
Melted butter cookies spread more during baking, making them thinner and crunchier. Softened butter, on the other hand, makes cookies cakier. For chewier cookies, use melted butter and slightly underbake them.
Brown Butter Technique
Brown butter cookies are a game-changer. This technique involves cooking butter until it turns golden brown. It adds a rich, nutty flavor to your cookies. It’s perfect for those looking to elevate their baking game.
Temperature Control Tips
To control butter temperature effectively, remember these tips:
- For soft butter, leave it at room temperature for about 30 minutes
- To melt butter, microwave in short bursts, stirring between each
- For brown butter, heat it in a light-colored pan to monitor color changes
By mastering butter temperature, you’ll be able to create cookies with your desired texture and flavor profile. Whether you prefer melted butter cookies or want to try brown butter cookies, experimenting with different butter states will take your baking to the next level.
Sugar Combinations and Their Impact
Sugar is key in cookie baking, affecting taste, texture, and look. Granulated and brown sugar are the top picks. The mix of these sugars greatly changes your cookie’s taste.
Granulated sugar makes cookies crispy and sweet. Brown sugar, with molasses, makes them chewy and richer. Bakers say using at least 50% brown sugar in chocolate chip cookies is best.
Trying different sugar mixes can get you the cookie texture you want. A mix of 50% dark brown and 50% granulated sugar works well. It balances sweetness, chewiness, and crispness, scoring high in taste and texture.
| Sugar Combination | Visual Grade | Flavor Grade | Texture Grade |
|---|---|---|---|
| 100% Granulated | B | B | B+ |
| 100% Light Brown | B+ | B+ | B |
| 100% Dark Brown | B+ | B+ | B+ |
| 50% Dark Brown, 50% Granulated | A+ | A+ | A+ |
Sugar in baking does more than add sweetness. It affects texture, spread, and color. Knowing this, you can tweak your recipe for the perfect cookie.
Proper Mixing Techniques
Mastering cookie mixing techniques is key to making the perfect batch. The way you mix your dough can greatly affect your cookies’ texture and taste. Let’s dive into how to mix cookie dough like a pro.
Creaming Method
Begin by creaming butter and sugar until they’re pale and creamy. This step adds air, making your cookies lighter. Use a kitchen scale for exact measurements – aim for 170 grams of packed flour per cup.
The ratio of granulated to brown sugar also matters. More brown sugar means chewier cookies.
Incorporating Dry Ingredients
Slowly add dry ingredients, mixing just until they’re combined. Overmixing can make your cookies tough. If the dough is too sticky, add a bit of flour to help it stick to the bowl sides.
Remember, using a kitchen scale increases precision and reduces variability in results.
Adding Chocolate Chips
Gently fold in chocolate chips to ensure they’re evenly spread. Use a cookie scoop for uniform sizes, which helps with even baking. Scooping dough onto a baking sheet before refrigerating makes handling easier.
By following these techniques, you’ll be well on your way to baking perfect chocolate chip cookies. Remember, practice makes perfect, so don’t be afraid to experiment and find what works best for you.
Dough Chilling Process
Chilling cookie dough is a game-changer for your baking adventures. This simple step can transform your cookies from good to extraordinary. Let’s explore why refrigerated cookie dough is worth the wait.
When you chill your dough, magic happens. The flour absorbs moisture, concentrating flavors and creating a richer taste. Just 30 minutes of chilling can add a “kiss of sweetness” as the flour breaks down into sugar. For optimal results, aim for a 2-hour chill time.
- Enhances texture, creating chewier centers and crispy edges
- Deepens flavor profiles, especially caramel notes
- Reduces spreading, resulting in thicker cookies
- Improves dough consistency, making it easier to handle
- Helps cookies maintain moisture, staying softer longer
For the best results, chill your dough for at least 2 hours or overnight. This allows ingredients to meld, creating complex flavors. If you’re short on time, even 30 minutes can make a difference.
| Chilling Time | Benefits |
|---|---|
| 30 minutes – 1 hour | Noticeable texture and flavor improvement |
| 2 hours | Optimal flavor and moisture absorption |
| Overnight | Significantly improved cookie quality |
Remember, chilling is especially important for recipes high in butter content. So next time you’re baking, give your dough some chill time. Your taste buds will thank you!
Cookie Shaping Secrets
Mastering the art of shaping cookie dough is key to achieving perfect cookies. The way you form your cookie dough balls can significantly impact the final result. Let’s explore some essential techniques for shaping cookie dough that will elevate your baking game.
Size and Thickness Guidelines
For consistent results, aim for cookie dough balls that weigh approximately 45 grams each. This size ensures even baking and a satisfying cookie size. When shaping cookie dough, form tall, cylindrical shapes rather than flat discs. This technique promotes thicker cookies with a softer center.
Spacing on Baking Sheet
Proper spacing is crucial when arranging your cookie dough balls on the baking sheet. Leave at least 2 inches between each ball to prevent them from merging during baking. This spacing allows the cookies to spread naturally without touching each other, resulting in perfectly round shapes.
Remember, the way you handle your cookie dough can make a big difference. For chewy cookies, use your hands to create rough, textured surfaces on the dough balls. If you prefer crispy edges, gently press the tops of the balls to create a slightly flattened shape. With these shaping secrets, you’ll be crafting bakery-worthy cookies in no time!
Perfect Baking Temperature and Time
Getting the cookie baking temperature right is crucial for great results. The best range is between 350°F to 375°F (175°C to 190°C). This range helps your cookies bake evenly, giving you crispy edges and soft centers.
So, how long do cookies take to bake? They usually need 8 to 12 minutes. But, the exact time depends on the cookie’s size and thickness. Bigger cookies might take longer, while smaller ones bake faster.
Here’s a guide to help you get your baking time and temperature just right:
| Cookie Type | Temperature | Baking Time | Special Notes |
|---|---|---|---|
| Standard Chocolate Chip | 350°F (175°C) | 10-12 minutes | Check at 8 minutes for doneness |
| Thick and Chewy | 375°F (190°C) | 11-13 minutes | Results in a thicker texture |
| Thin and Crispy | 350°F (175°C) | 8-10 minutes | Spreads more during baking |
| Large Cookies (6 oz each) | 350°F (175°C) | 20-22 minutes | Internal temp should reach 175°F-185°F |
Pro tip: Use parchment paper for even baking and easy cleanup. 75% of bakers recommend it! Also, chill your dough for at least 30 minutes before baking. It makes the cookies taste better and feel softer.
Watch your cookies closely as they bake. They’re done when the edges are golden but the centers look a bit underbaked. This way, your cookies will stay soft and chewy as they cool. Happy baking!
Visual Cues for Perfectly Baked Cookies
Mastering cookie doneness is key to baking perfection. Knowing when cookies are done can be tricky, but visual cues make it easier. Let’s explore the telltale signs of perfectly baked cookies.
Edge Coloration
Look for golden-brown edges as a primary indicator of cookie doneness. This coloration typically appears between 10-12 minutes when baking at 350°F. The edges should be set and slightly firm to the touch.
Center Texture
The center of your cookies should appear slightly underbaked when you remove them from the oven. It might look shiny or wet, but don’t worry. Cookies continue to set as they cool, resulting in that perfect chewy texture.
Cooling Indicators
After removing cookies from the oven, let them cool on the baking sheet for about 5 minutes. They should firm up and become easier to transfer. If they’re still too soft, they might need more baking time.
Remember, cookie doneness varies by recipe. Drop cookies typically take 8-10 minutes, while larger cookies may need 12-15 minutes. Trust your instincts and these visual cues to achieve cookie perfection every time.
Proper Cooling and Storage Methods
After baking your delicious chocolate chip cookies, cooling and storing them properly is crucial. Let your cookies rest on the baking sheet for a few minutes before transferring them to a wire rack. This step allows the cookies to set and prevents them from breaking apart.
Once cooled, store your cookies in an airtight container at room temperature. They’ll stay fresh for about three days. For longer storage, consider these options:
- Refrigerator: Soft cookies last up to 3 days
- Freezer: Baked cookies or cookie dough can last up to 3 months
When storing chocolate chip cookies, keep them in a single layer to maintain their shape. For crispy cookies, a container with a looser lid works best. To keep soft cookies moist, add a slice of bread to the container.
For freezing, roll cookie dough into balls and freeze for an hour until solid. When baking from frozen, add 1-2 minutes to the original bake time. Remember to use parchment paper between layers to prevent sticking.
By following these cooling and storage methods, you’ll ensure your homemade chocolate chip cookies stay delicious for days or even months!
Troubleshooting Common Issues
Even the most experienced bakers face cookie baking problems. Let’s explore how to fix these issues to make your chocolate chip cookies perfect every time.
Spreading Problems
Spreading too much can be a problem. It might mean you’re using too little flour. The Nestle Toll House recipe suggests 2 1/4 cups of flour. Adding an extra 3/4 cup can help prevent this.
Too much butter can make cookies flat and greasy. Use only 1 cup of softened butter for the right texture. Chilling the dough before baking also helps control spreading.
Texture Concerns
Gummy, cake-like cookies might mean you’ve added too many eggs. To fix this, add more flour and sugar. If your cookies are hard or dry, you might have overmixed the dough or used high-protein flour.
Try using cake-and-pastry flour for lighter, crumblier cookies. Remember to cream sugar and butter for at least 2 minutes for the perfect texture.
Baking Challenges
Baking at 375°F for 15 minutes is the best approach. Lower temperatures can cause spreading, while baking too long can dry out cookies. Use parchment paper to prevent sticking.
For richer flavor, choose high-quality chocolate with at least 60% cocoa content. By addressing these common cookie baking problems, you’ll be ready for any baking challenge.


